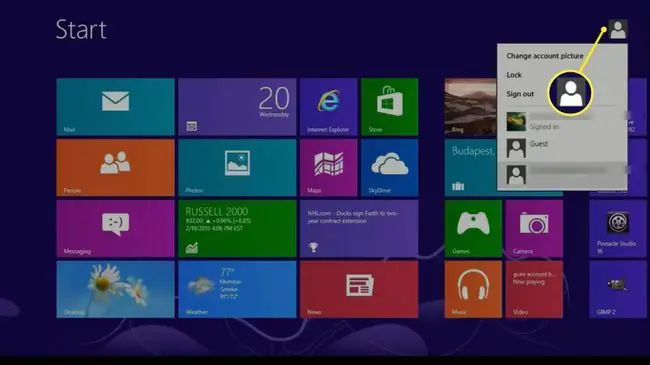
Txawm hais tias Windows 8 interface txawv ntawm Windows versions dhau los, nws tseem tuaj yeem teeb tsa ntau tus neeg siv hauv zos thiab Microsoft cov nyiaj. Txoj kev ntawd, txhua tus neeg uas siv lub computer tuaj yeem tiv thaiv lawv tus kheej cov ntaub ntawv thiab nyiam nrog tus password.
Cov lus qhia hauv kab lus no siv rau Windows 8 thiab Windows 8.1.

Yuav ua li cas ntxiv Windows 8 Cov neeg siv rau Cov Nyiaj Txiag uas twb muaj lawm
Txhawm rau ntxiv tus neeg siv rau koj lub khoos phis tawj uas twb muaj Microsoft account:
-
Press Windows key + C kom coj mus rau Charms bar, ces xaiv Settings.

Image -
Xaiv Hloov chaw PC.

Image -
Xaiv Users hauv qab PC Chaw.
Yog siv Windows 8.1, xaiv Accounts hauv qab PC Chaw.

Image -
Scroll cia los ntawm txoj cai pane thiab xaiv Add a user hauv qab Lwm tus neeg siv.

Image -
Nkag mus rau email chaw nyob cuam tshuam nrog Microsoft account thiab xaiv Next.
Yog koj email chaw nyob xaus rau @live.com, @hotmail.com, lossis @outlook, ces koj twb muaj Microsoft account.

Image -
Kaw lub npov ntawm ib sab Puas yog tus menyuam tus account? yog tias koj xav ua kom lub Windows Family Safety feature, uas tso cai rau koj los tshuaj xyuas cov nyiaj ua haujlwm thiab thaiv qee cov ntsiab lus. Xaiv Finish mus txuas ntxiv.

Image
Tus account tshiab yuav 'muaj nyob rau ntawm qhov kos npe hauv npo thaum koj pib Windows. Txhawm rau hloov ntawm cov profiles, xaiv lub profile icon nyob rau sab xis saum toj kawg nkaus ntawm Windows 8 Start screen.

Koj lub computer yuav tsum txuas nrog internet thawj zaug uas tus neeg siv tshiab nkag rau hauv lawv tus account. Thaum lawv ua tiav, lawv cov keeb kwm yav dhau, kev teeb tsa tus account, thiab cov apps (rau Windows 8.1 cov neeg siv) yuav raug synced.
Yuav ua li cas ntxiv rau Windows 8 Tus Neeg Siv Tsis Muaj Microsoft Account
Yog tias tus neeg siv tshiab tsis muaj Microsoft account, lawv tuaj yeem tsim Outlook.com email chaw nyob, lossis koj tuaj yeem teeb tsa tus neeg siv khoom hauv zos:
-
Press Windows key + C kom coj mus rau Charms bar, ces xaiv Settings.

Image -
Xaiv Hloov chaw PC.

Image -
Xaiv Users hauv qab PC Chaw.
Yog siv Windows 8.1, xaiv Accounts hauv qab PC Chaw.

Image -
Scroll cia los ntawm txoj cai pane thiab xaiv Add a user hauv qab Lwm tus neeg siv.

Image -
Xaiv Sau npe yam tsis muaj Microsoft account.
Yog tias koj xav tsim Microsoft tus account tshiab rau tus neeg siv, xaiv Sau npe rau email tshiab thiab muab cov ntaub ntawv thov.

Image -
Xaiv Local account nyob hauv qab ntawm qhov screen.

Image -
Nkag mus rau tus neeg siv lub npe, lo lus zais, thiab cov lus qhia rau koj tus lej siv tshiab, tom qab ntawd xaiv Tom ntej.

Image -
Khib lub npov ntawm ib sab Puas yog tus menyuam tus account? yog tias koj xav ua kom lub Windows Family Safety feature, ces xaiv Finish.

Image
Yuav ua li cas pub txoj cai tswjfwm rau Windows 8 cov neeg siv
Txhawm rau muab cov cai tshiab rau cov neeg siv kev tswj hwm hauv Windows 8 thiab 8.1:
Muab cov neeg siv kev tswj hwm tso cai rau lawv nruab cov kev pab cuam thiab hloov pauv rau qhov kev teeb tsa.
-
Qhib lub Windows 8 Tswj vaj huam sib luag thiab teeb tsa View los ntawm rau Me icons, tom qab ntawd xaiv Tus neeg siv nyiaj.

Image -
Xaiv Hloov koj tus account hom hauv qab Ua hloov rau koj tus neeg siv tus account.

Image -
Xaiv tus lej koj xav ua tus thawj tswj hwm.

Image -
Xaiv Hloov hom tus account.

Image -
Xaiv Administrator, ces xaiv Hloov hom account.

Image
Yuav ua li cas tshem cov neeg siv nyiaj hauv Windows 8
Txhawm rau rho tawm tus neeg siv nyiaj hauv Windows 8 lossis 8.1:
-
Qhib lub Windows 8 Tswj vaj huam sib luag thiab teeb tsa View los ntawm rau Me icons, tom qab ntawd xaiv Tus neeg siv nyiaj.

Image -
Xaiv Hloov koj tus account hom hauv qab Ua hloov rau koj tus neeg siv tus account.

Image -
Xaiv tus account koj xav rho tawm.

Image -
Xaiv Delete the account.

Image
Yog siv Windows 8, koj yuav muaj kev xaiv rho tawm tus account tus kheej cov ntaub ntawv lossis tso rau hauv koj lub hard drive. Windows 8.1 tsis muab qhov kev xaiv no, yog li thaub qab txhua yam koj xav khaws cia.


